What’s the best way to make a door pull? Recently, I was asked this very question. Well obviously, I’m biased and for the sake of the title of this article, I’ll just say one of the best ways to make a door pull is to forge it!
To forge a twisted door pull you will need some ½” square bar, a hammer, an anvil, tongs, a vice, and of course a way to heat the metal. (Preferably a forge)
After you forge the pull you’ll want to finish the handle with boiled linseed oil or paste wax, and of course, you will want to drill a hole or three so you can secure it to a door. For now, keep reading and we’ll go over how to forge it.
If you would rather see the process on YouTube, click on the video below. Or, skip it and hopefully, the rest of the article won’t put you to sleep.
Prepping the Stock
Start by cutting the ½” square stock to your desired length. I cut mine to 7”. For your first go at this, start with 7” and later you can experiment with different lengths based on your requirements.
Next, we’re going to divide the steel into five different sections.
Using a silver pencil, measure and then mark the following.
- ¾” in from both ends
- 1-¼” from the ¾” line on both ends
The four marks should look like this.

Notice that there are five sections. Each section corresponds to a part of the pull that you are going to forge.
- The two end-sections will be flattened allowing you to screw the pull to the door.
- The 1-¼” sections will be tapered and bent in order to give clearance for your fingers.
- And the center-section will be the pull itself. The handle. It will be twisted or otherwise decorated to make the handle stand out.
Now that you’ve marked the sections, use a center punch and place one mark on each line. This way you will be able to see the mark when the steel is red hot.
If you need help, watch the video below for an explanation.
Isolating the Mounting Tab and Forging the Taper
First of all, I just made that term up, “Mounting Tab.” I actually don’t know what the correct terminology is. Needless to say, this is the piece, however shaped, that makes contact with the door and has a hole or two for screws.
To isolate these tabs, you will need to use half facing blows. Meaning, half of the hammer face will be over the anvil, and the other half extended off of the face of the anvil.
It looks like this.

Align the metal so the center punch mark is directly centered over the edge of the anvil, then begin striking the square stock ensuring that your blows are both half-faced and square.
Tip: Use a rounded edge on your anvil, preferably ⅛”-¼”.
This may be tricky at first, but it’s easy to get the hang of it over time. During this forging session, make sure that you work the metal hot and only work two sides. Strike one side, then rotate the metal 90 degrees and work the next side.
Alternate back and forth, twisting the tongs 90 degrees one way and then the next. This will 1) isolate the Mounting Tab and 2) begin a slight taper on the 1-¼” section of material.
Continue Forging the Taper
Once you have isolated the Mounting Tab, continue to work the taper back and forth working the same two sides that you started with.
Allow the junction between the Mounting Tab and the taper to neck down until the metal is approximately ⅛ of an inch.
Caution: Work the metal hot!
Keep the metal hot when forging this area. Steel has a tendency to crack and break when worked too cold.
Once you’ve neck the metal to ⅛” keep forging, maintaining a consistent angle to the face of the anvil work a smooth square taper from the neck to the next center punch mark.
Rounding the Taper
Now we’re going to forge the square taper into a smooth round taper.
This is done in two distinct stages.
- Forging to Octagon
- Forging to Round
Hold the taper on edge and hammer with even blows. Flatten each edge until you roughly have an octagon shape.

Next, forge each of the now eight edges while turning the metal until you have a nice round taper.
This may take several attempts and subsequent heats, but take your time and keep working it until you are happy with the end result.
Tip: Many people love the rough look. It doesn’t need to be perfect.
Twisting the Center Section
Before we repeat the forging process that we just finished, we are going to address the handle. In this particular case, we are going to do a simple twist.
The first step in this process is to bevel the edges. This is optional. If you bevel the edges the handle will have a soft appearance and feel during use. On the other hand, if you don’t bevel the edges, they will be sharp. It all depends on the look you’re after.
Personally, I like a ⅛” bevel which is a simple process. Heat up the metal and use light square blows to forge the bevel.

Place the metal back into the forge and let it really soak in the heat until it’s a nice angry ret-hot color. While it’s heating up, go ahead a prepare your area for twisting. Get your twisting wrench out, open your vise, and have a metal brush handy to brush off the scale.
When the metal is nice and hot, place it in the vice taper down and using the twisting wrench, turn it once or twice along the long axis.
The set up should look like this.


Repeat All of the Steps Prior to Twisting
- Isolating the Mounting Tab and Forge the Taper
- Continue Forging the Taper
- Round the Taper
Important: After the third step, ensure you feather the round taper with the twist!
Forging the Mounting Tabs
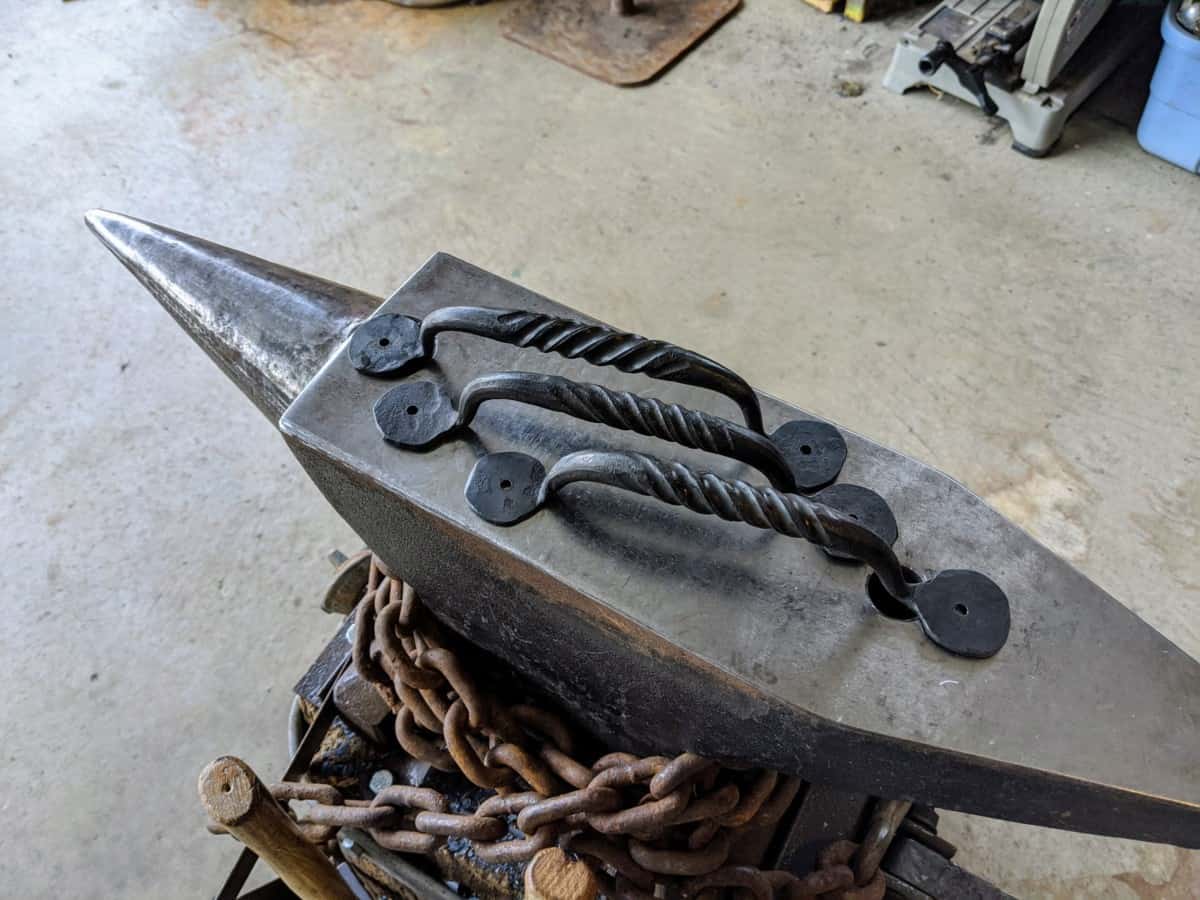
Okay, let’s check where we are at this point in the process.
Your piece should look like this.

I’m not going to lie, this step isn’t too difficult. Believe me, I’ve tried to screw it up while experimenting and in each case, they all turned out great.
Heat up the Mounting Tab and forge it flat. Forge it on the diamond with just the tab on the face of the anvil. Use your cross peen as needed to even out the spread, and try and just have fun.
It’s a win if it’s flat and a shape you can live with. 😉
This is what I did.

If you watched the video then you might have gleaned that I am attempting to match an old door pull a friend gave me. That’s why I went with a roundish look. You can do what you want.
If you want more of a spade or leaf look, try pointing the Mounting Tab before any of the other forging steps.
Final Step – Bending the Handle to its Final Shape
For this, we go back to the vice.
Heat the Mounting Tabe and the taper to a red heat and then secure the tab (only) in the vice with the handle pointing straight up.
Then, with your tongs holding the top securely, use your hammer to forge in your desired handle shape.
Like this.
Most of the time the handle isn’t perfect at this point. I’ve tried straightening the handle with a wooden mallet on a 2×4 (like in the video) but I’ve learned that it’s easier and faster to make the small adjustments required in the vice with a strong pair of tongs or pliers.
Final Comments
After forging, use a sealing agent like paste wax or boiled linseed oil to seal and blacken the handle. Also, a hand drill or drill press makes quick work to drill a hole or two in the mounting tabs for the screws.
A word on twisting direction. You can twist every handle the same direction each time or consider making a set of handles, one twisted clockwise and the other counterclockwise.
I hope you enjoyed the project. I certainly did the first time I tried this. You know, there is something truly satisfying about making your own tools and hardware. Door pulls like these will last a lifetime and they will be made with your own two hands.