If you are new to blacksmithing it’s important to choose the right projects. When I started, I often chose projects that were above my skill level which more than once led to failure and discouragement.
Ideal projects to start blacksmithing include hooks, brackets, door pulls, and letter openers. The best beginner projects are those that encourage practicing blacksmithing fundamentals like drawing, rounding, tapering, and curling.
Since you’re reading this I’m going to assume that you are as excited as I am to do some blacksmithing! So let’s get you started on hitting some hot metal!
It’s important to choose doable first-time projects so that you can both learn new techniques and ultimately build the skills needed to progress to more complex and challenging projects. Also, it feels good to succeed and step back and be proud of what you just did!
The projects listed below range from easiest to most difficult, and each project has two or more variations!
#1 Hooks
The perfect starter project! Forging a hook is an easy project and teaches you how to Taper, Scroll, Twist, and Punch metal.
All you need to get started is ¼ – ½” square stock. You can certainly use scrap metal you have lying around the shop.
PRO TIP: Use metal with a little parent-stock so you don’t have to use tongs!
Drive Hook
This is arguably the easiest hook to make.
Forge using ¼” square stock.
In its simplest form, it is a hook and a nail. I’ve got these all over my shop pounded into the walls. They are not only a great project to start smithing, but also a way to hang and organize tools.
At a minimum, you will need to taper one end to a point so that it can be driven into a wall and as your skills forging this hook increase, try throwing in some scrolling and twisting.

The first drive-hook I ever forged. Made it out of a headless railroad spike. Why? Because it was the only metal I had at the time. 😉
J-Hook
This is also a simple hook, but you will need a hole either punched or drilled at the top of the J.
Forge using ¼” square or round stock.
As with the drive hook, these can be made plain and later you can experiment with twists and scrolls.

Here are some plain J-hooks in action as part of a larger shelf project.
S-Hook
Here is your third hook challenge, the S-Hook!
If you can forge the J-hook, you can forge an S-hook!
Forge using ¼” square stock.
S-hooks are great for hanging pots and pans or even hanging plants.
Forging an S-hook will continue to help you solidify your skills tapering, scrolling, forming the hook itself, and twisting.

Who said it has to be a perfect S shape? This was forged out of an old U-bracket bolt. It fits perfectly over an office space cubicle wall. I made several of these for friends who wanted a way to hang their headphones.
Decorative Hook
There are many variations of decorative hooks that come to mind, but I think the best for the beginner smith is a Leaf End Wall Hook.
Forge using ½” square stock.
The main structure of the hook is a J style hook and will need a hole punched or drilled. The top of the J, however, sports a little branch and leaf that curls away from the hook and rests on the wall when mounted.
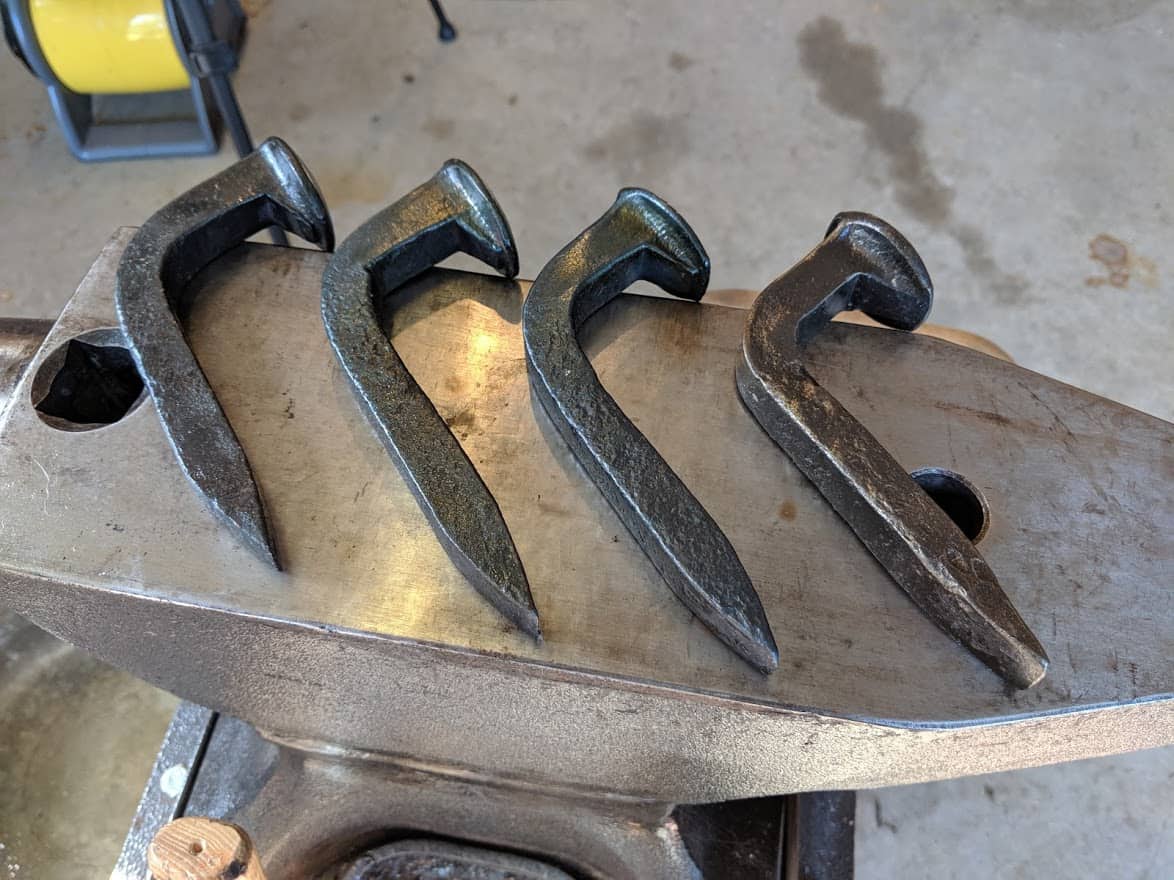
Bonus Hook – Railroad Spike Hook
This won’t be much of a challenge once you have mastered the hooks above, but it’s fun to do none the less.
Forge using railroad spikes.
There are a few cool ways to do this (just Google railroad spike hook) but the easiest is a simple 90-degree bend.

Great for Rustic Coat Racks!
#2 Letter Opener
I think every smith at one point or another has wanted to forge a knife. Forging a letter opener is a great first step towards that goal.
You can practice using scraps around the shop and if your “knife” doesn’t work out, you can simply call it a Letter Opener. 😉
Forging a letter opener will allow you to practice drawing, tapering, rounding, scrolling, and beveling. Additionally, you will probably need to do some filing to refine the edge.
Here are a few examples.
Hook Handle Letter Opener
Continuing with the hook projects from the previous section, forge a simple letter opener with a hook as a handle.
Forge using ½” round stock (or experiment with scraps around the shop)
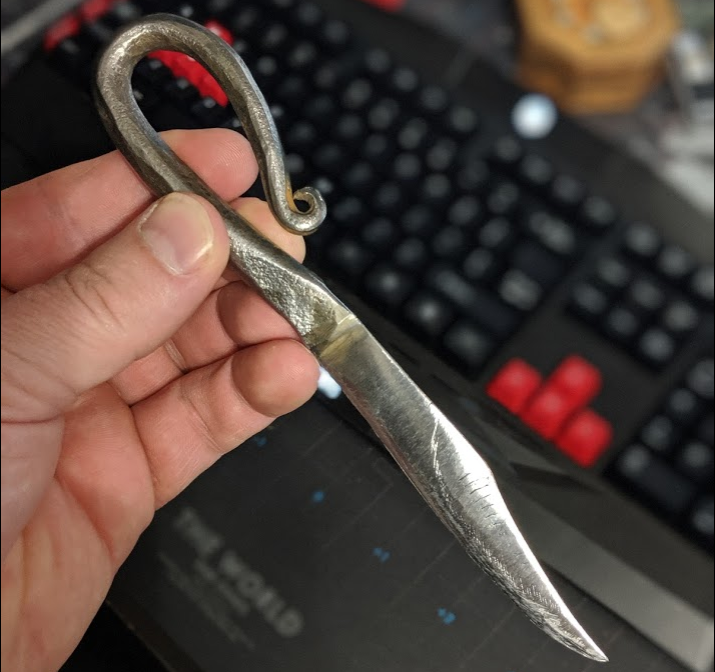
Forged using part of an old rusty leaf spring bolt (non-galvanized)
Leaf End Letter Opener
For this project, forge whatever shape of letter opener you wish, but incorporate a leaf end handle like in the hook example.
Forge using ½” round stock
Who was it that said…
“Move the metal until it moves you!”
Whoever it was they offered some very valuable advice.
Letter Opener Dagger
Here is where you can let your creativity shine (or pretend you are making a knife).
Forge a one or double-edged letter opener with the handle of your choosing.

It’s a letter opener with a identity crisis!
#3 Pulls
Door Pulls, Gate Pulls, Handles, whatever you call them they are what you grip to pull something open.
Pulls are made from a variety of materials to include round stock, square stock, and flat stock.
Classic Door Pull
This is what you would expect to find on an old farm barn or shed door.
Made with 1” x ⅛” flat stock they reinforce fullering, tapering, scrolling, and using a chisel (depending on your design). You can either punch or drill the holes needed to mount the handle.
Gate Pull with a Twist
This is your standard grab-handle not only for gates but for anything that needs to be tugged. Smaller versions are perfect for drawers and cabinet doors.
You don’t need to put a twist in the handle, but it does add a nice touch.
Forge with square stock sized to the application (¼”, ⅜”, & ½” square stock all work nicely)
Industrial Door Pull
To be fair, this is a medium to advanced project and a bit of a challenge compared to the others on the list as it combines two pieces of metal together.
The Industrial Door Pull combines a plate with a handle. Each needs to be forged separately and then combined for the finished project.
#4 Bottle Opener
Bottle Openers come in many shapes and sizes. The point here is to get out of your comfort zone and have a little fun.
The Classic Bottle Opener
The most come and perhaps the best example of a bottle opener is the Classic design demonstrated here by John Switzer from Black Bear Forge in Beulah Colorado.
Railroad Spike Bottle Opener
The Railroad Spike Bottle Opener is an idea that I have that actually hasn’t come to fruition.
The concept is easy enough. Grab an old Railroad spike and forge a bottle opener. The opener I plan on making, however, will have a flat head so it will balance on the counter or bar top after using it.
#5 Brackets
Some of the best blacksmithing projects allow you to combine metal with wood and that is expressed very well by forging brackets for shelves.
Forging a simple shelf bracket is actually not very difficult, however, the difficulty increases once you start adding decorative scrollwork to accent them.
The material needed varies, but generally, brackets are made using flat bar stock.
Rustic Shelf Brackets
A simple bracket is formed by making a single 90-degree bend in the flat stock. While that would be functional, it would look rather simple.
An easy way to add interest to the piece is to knock down or bevel the edges. Using different hammer strokes it’s not hard to create a Rustic look to the bracket.
Here’s another picture of the Railroad Spike Coat Rack. Notice the rustic brackets on either end.
Shelf Brackets with Scrollwork
For some, this may be the most challenging project on this list. The brackets shouldn’t pose many difficulties if you’ve progressed through the projects in order, but the decorative scrollwork can be challenging.
Forging one decorative scroll shows skill. Forging another that matches the first, shows mastery.
For me, projects like these that combine blacksmithing with woodworking can be some of the most rewarding.
This is a simple shelf I made as a housewarming gift for my father’s new home.
Conclusion
So there you have it. Five Blacksmithing Project Ideas for the Beginner! I chose to write about these projects because they are the same projects that I started with.
Truth be told, I first tried to forge a few things that were well above my skill level and I utterly failed. Failing was a good thing though, because it taught me to start at the beginning, to learn the necessary skills and that becoming a good blacksmith is a process.